A flow for containers
Testing Wercker
Why#
One of the issues in a container-based architecture is how painful it is going from code to deployed containers.
Initially you can think it’s only two steps: build an deploy.
But when you pass the cowboy stage, things get more complicated. You need to analyse, test and build the code. You need to build the container with the new executable inside. You need to push the registry. And then you need to deploy the code, with potentially additional tests. And deploy tomany different environments.
Those who have been playing with containers for some time will have built a workflow gluing different tools in a more or less brittle process. In my case, we have gradle tasks that have some of the logic, but we use a CI server (Teamcity) that has all the build steps for different processes, including building and testing the source code, building and testing the container, pushing the container to a registry, and deploying and testing the container in an environment.
The end result is we have a lot of logic about the workflow inside the CI, independent of the code. And the whole process is difficult to setup and painful to maintain. New different services end up needing a new build, a new deployment process.
And your CI process is a mess.
Whenever there is a pain, you end up having people providing a service that avoids it. In this case there are various different companies offering services to build, publish and deploy containers. The most promising is Wercker, but there are others such as Shippable or even (not container focused) CircleCI.
I heard about them and, for unrelated reasons, I decided I was going to give Wercker a spin. It has a free tier, which allows you to experiment.
What#
But what to deploy with Wercker? I use Scala at work, so probably it would had been easier to create a Scala project.
Howeverm I’ve been trying to learn Go for some time, and I had never found time for it (not that I’m super-busy, just too many things to learn). So I thought it would be a good idea to play a bit with Go and create a new app in that language.
I grabbed one example for a wiki in Go, and gave it a twist, modifying just enough to get a glimpse of the language. The code is not pretty, and the functionality isn’t either (including all kind of security issues).
But it was a way to get a sense of things I liked and things I didn’t like. I’ll leave for a future post my experience with Go.
Where#
OK. I was going to deploy a new app in Go. But where should I deploy it?
The power of Wercker is using external registries and deploying using an orchestrating tool such as Kubernetes or ECS.
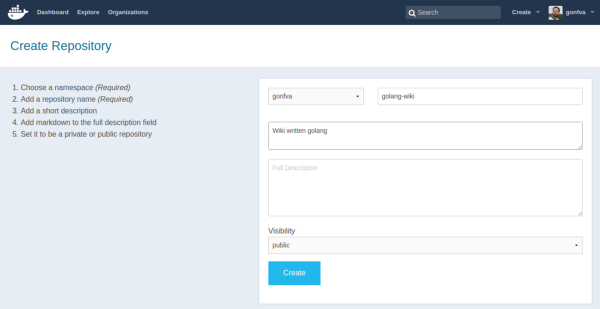 Creating a repo in DockerHub
For an external registry, I went for DockerHub. DockerHub is free for public repositories. I have no experience with Quay, although, from what I’ve heard it’s also widely used as a private registry.
On the orchestration thing, not too much thinking either. As I’ve mentioned before, my company was in the process of moving from CoreOS+fleet to Kubernetes so I have more experience with Kubernetes.
But in its purest “let’s shave the yak” approach, I decided that it would be very cool to test the new tool to build a new Kubernetes cluster, and do it in AWS. Yeah, it doesn’t matter there are easier ways for deploying Kubernetes to AWS.
I wanted to be able to recreate the cluster many times. Therefore, in the end, I created an Ansible script. You can find the source code for that in this Github repo, but, like the Go example, it is not something I would be proud of. The code is basically an implementation in Ansible of the things you can read in the kubeadm page, for my very specific case.
How#
Once I had the Golang app running locally, and a Kubernetes cluster in AWS, it was time to start using Wercker.
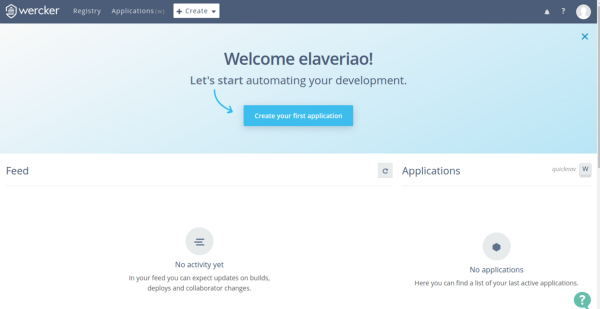 Login page in Wercker
Creating an account is a doddle. You only need to choose username, email and password. Next you receive an email to activate your new account. You confirm the email by clicking on a link and that’s it.
Or at least, that’s how it looks.
After the first login, in the first page I chose “Create your first application”. The name is a bit confusing, because the subsequent page is a wizard to connect to your code repository.
So you are not creating your first application, you’re setting up things.
In that wizard there are three steps:
- Choose a repository: You need to tell where your code resides. Currently there are two options: Github and Bitbucket. So you click on connect and you are redirected to the typical OAuth process. After authentication, you get a list of repos where you can choose.
- Choosing your access: This is a bit confusing. But for public repositories, the recommended “Wercker will checkout the code without using SSH key” is the good one. “Public repo, move along” would be a better name.
- And you’re all done. No really third step.
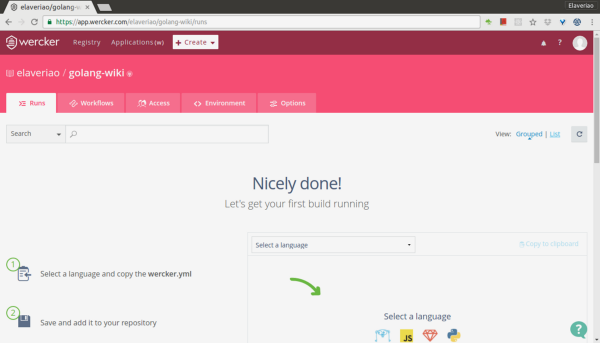 Choose a language to create a new templateAt this point, your app is created in Wercker’s terms
But you really are only connected to the code. You will need to really configure the application.
Wercker is configured by putting a file with a specific name (wercker.yml) at the top folder of your source code.
To create a first version of the file, you’re suggested some templates depending on the language the code is written in.
So you create wercker.yml, you add it to your local copy of the repo, and you push to the external repo you’ve configured. Once you’ve pushed, Wercker automatically detects the change and triggers a build (since I hadn’t setup any hooks in github, I found it quite cool).
But you wouldn’t be using Wercker if you only wanted to build a go project.
Wercker’s power is in the flow with three main concepts:
- Steps: These are the definitions of the tasks that will be executed. They are written in the wercker.yml file. Steps can be quite complex things like spinning up a new Kubernetes cluster.
- Pipelines: These are some tasks linked together and glued with some environment variables. For example, the same deployment task may be used twice, once to deploy to an environment and another for a different environment. Or the build task to build a debug configuration or a release configuration.
- Workflow: This is a higher level of abstraction that chains and forks pipelines to build a flow for your code. So the first template we were suggested is not the default template. It only builds the code. We will need to add more things to see the real power.
Build my container
The first thing will be to build the container out of the executable.
The template may be a bit confusing because it mentions containers but it doesn’t really build a container yet. It mentions containers because every step in Wercker goes through containers, allowing perfect isolation and reproducibility of your builds.
But you still need to build the image.
For many people, containers are like VM. You bundle the tools inside, and speaking from experience, it’s not uncommon to have 2 GB images rolling around. With Wercker you can create a container from scratch. And since golang generates self-contained binaries, that’s super-easy: you only need to copy whatever you need to the folder “$WERCKER_OUTPUT_DIR”, and then use the task internal/docker-scratch-push, that both generates the image and pushes to a docker registry.
The code added to push to my existing wercker.yml file was
registry-push: box: google/golang steps: — internal/docker-scratch-push: username: $USERNAME password: $PASSWORD tag: $WERCKER_GIT_COMMIT ports: 8080 repository: gonfva/golang-wiki registry: https://registry.hub.docker.com/v2 cmd: ./appDon’t forget to add the cmd parameter, because otherwise your container won’t know what to start (it’s obvious but it took me a while to notice why my containers weren’t starting)
Once you do any change and push it, your application will be rebuilt. Also if you get an error, you will be notified via email.
But registry-push is a new pipeline in Wercker’s terminology. And we need to register before using it. And we will need to define the environment variables that we used in the step.
To do that, you need to go to your app in Wercker, go to the Workflow tab, and click on “Create pipeline”. Over there you will have to fill the same name twice (registry-push in this case). Once you’ve created the pipeline, you need to add the environment variables needed (in this case $USERNAME and $PASSWORD) After that is done, you need to add the newly created pipeline to your existing workflow and relaunch the build.
Deploy to a Kubernetes cluster.
We’ve built our code, we’ve created the container, we’ve pushed the container to Docker Hub. And then, finally, we want to deploy the container to my already launched kubernetes cluster.
This took me a while because of three important issues.
Replication controllers and Services. The service is easy. It’s always the same file. So we create a file wiki-service.yml in the repo. But for the replication-controller we want to deploy a new version every time. In some examples you will see a builder. Another possibility is to have a template inside the code, but replace the variables using a step.
- script: name: create wiki-controller code: sed -i “s/WERCKER_GIT_COMMIT/$WERCKER_GIT_COMMIT/g” wiki-controller.jsonDon’t copy services or replication controllers from existing examples, because the apiVersion may not be valid.
Rolling updates. You’ve got your service and your replication controller. I tried to do a rolling update, but couldn’t make it work. There is an incompatibility issue among versions. So I had to do a direct kubectl apply. The problem with direct update is that the replication controller gets updated but pods don’t. So you will need to kill the pods.
The steps in my Wercker file were
deploy: steps:
- kubectl: server: $KUBERNETES_MASTER token: $KUBERNETES_TOKEN insecure-skip-tls-verify: true command: apply -f wiki-service.json –validate=false- kubectl: server: $KUBERNETES_MASTER token: $KUBERNETES_TOKEN insecure-skip-tls-verify: true command: apply -f wiki-controller.json –validate=falseAuthentication. Most of the examples deploying to Kubernetes use username and password to access Kubernetes API server. But kubeadm (the system I used to create my cluster) doesn’t add the basic authentication module, so I was stuck with either token or certificate authentication.
Wercker’s documentation at this point is frustrating. I couldn’t find any examples with certificate-based authentication. Not sure how, I discovered you can pass some other options like token, client-certificate and client-key to the kubelet step. However the certificate parameters are not plain variables, but names of files.
And I couldn’t make it work.
But I managed to use the token parameter, passing the value you can find inside the cluster at the file /etc/kubernetes/pki/tokens.csv.
As I mentioned before, you can find all the code for this post in this repo for my golang wiki and also in my repo for kubeadm cluster creation.
Conclusion#
If you’ve read this far, you may perceive that yes, Wercker is cool, but nothing else.
However, consider that with a file inside the repo, and some configuration about workflows and pipelines, you can go from code to deployed containers.
Code to deployment, all the way.
Wercker is more than docker build on the web. You may discover you no longer need your CI.
Don’t get me wrong. There are some things that need some refinement. The documentation is a bit patchy. Sometimes you have to direct cluster manipulation to know what is happening. There are things you are required to do that could be automated. And I don’t feel comfortable giving usernames and passwords for services.
But if you are just starting with containers, or simply you are not happy with your CI/CD pipeline, I strongly encourage you to take a deep look at Wercker. Even if you still feel the need to reinvent the wheel, you will learn a lot of very interesting things.
First published here