Virtual Reality in macOS (II)
My guide on what to buy, what to expect & how to make it work.
TLDR; VR on macOS means beta, crashes, unusable WebVR, and no games. But you get to learn a lot. This post explains my experience.
It seems this time I’m one of the few non-professionals that has bought an HTC Vive and a Mac after June’s keynote. Not sure today, but three weeks ago I couldn’t find anywhere in the Internet what to buy, how to make it work, and what to expect.
When I finally managed to set up everything, the result was so anti-climatic that I thought I had done something wrong and asked for official support (and they replied!!!)
Things are slowly maturing in the software front. But the experience is still of a being pioneer.
So I thought that I should write a post with the things I would have liked to read a month ago. Including the probably-trivial-but-unknown-to-me stuff. In fact the idea for this article came before the one for part 1.
I will be speaking from memory (no notes), so please ask if you had questions and I will try to help. And don’t laugh at me too much.
Buying#
Let’s start with what to buy.
There is no Oculus for Mac. There used to be but it’s no longer supported. Your main option is HTC Vive.
I went for an already expired bundle that included the devices, some games, some gift card to buy games in Steam a free month in VivePort. Apparently since then the price has been reduced.
To clarify, Steam is kind of a Google Play or Apple store, but for games. You can pay and download games and “experiences”, traditional or VR, for Linux, Windows or Mac. And my understanding is that Viveport is another take on the same idea. For me the important part was that deal had a reduced price. I didn’t consider the bundle. And you shouldn’t either for now, since none of the games work in macOS. THERE ISN’T ANY GAME for VR in macOS in Steam. None. Zero. Zip.
In the checkout process I got offered the option to buy a DisplayPort adapter. I didn’t buy it, because the connection in the iMac is USB-C. I bought instead this cable from Amazon. It’s USB-C to HDMI 2.0. And it works perfectly. There are other HDMI 1.1 but I would go for the HDMI2. There are other HDMI2, but I haven’t tested.
Side note. The experience buying HTC Vive was a bit crappy imo. After spending a substantial amount of money, if you don’t receive confirmation of the order in the first hour, you get a bit anxious. You know you put the email right because you checked it twice. And you know the order went through because your card was charged. So I contacted the company that hosts the shop (Digital River). Digital River replied some time later that they didn’t deal with HTC EMEA sales and I should contact HTC on a specific email. At that point I was in panic mode. Worse than spending an insane amount of money in one device is spend it and not receive it. Fortunately, mere 10 minutes after contacting HTC I received my confirmation email and I could breathe.
And then I received my order relatively fast.
Obviously, the experience buying the cable from Amazon, as good as always.
With Apple, I went for the iMac 5k 27 inches, Core i5 with Radeon Pro 580 with 8GB and 16 GB RAM.
Why that model? There are other iMac with a dedicated card, so I considered going for something less expensive. But then I read this footnote-6:
 Requires macOS High Sierra 10.13 27-inch with Radeon Pro 580 recommended for 3D VR content creation and 360 video editing. Final Cut Pro X will add support for 360 video editing later this year.
I considered going for the i7, but thought it didn’t worth it, but definitely upgraded RAM from default 8GB.
Does it work with other models? I don’t know. This guy seems to have used Apple’s offer to set an external GPU on a Macbook Pro
#VR development w #MacOS #Steam VR installed #HTCvive set up #indiedev #gamedev #Apple #MacBookPro #VRCommunity Next: install #UnrealEngine pic.twitter.com/RbzsIVCXgC
— Mike Laaksonen (@AnalyticMike) July 11, 2017
About the delivery from Apple, I’ve got mix-feelings.
Delivery took about a week. But it was when I was told it would be at checkout. And everything went fine.
Installing the devices#
There are no unboxing pictures. When preparing these notes I took a picture of the goggles (they are called HMD), the controllers and the box that connects everything.
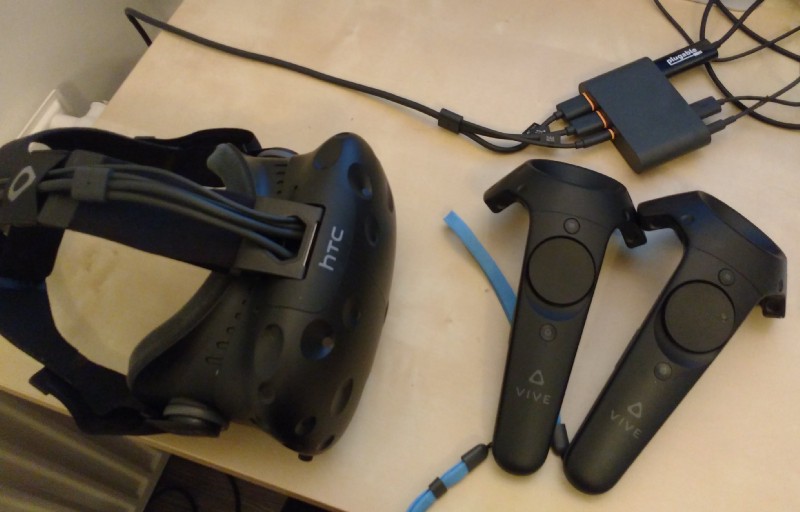 Goggles, controllers and box
And here is another picture of a base station (the system is called Lighthouse).
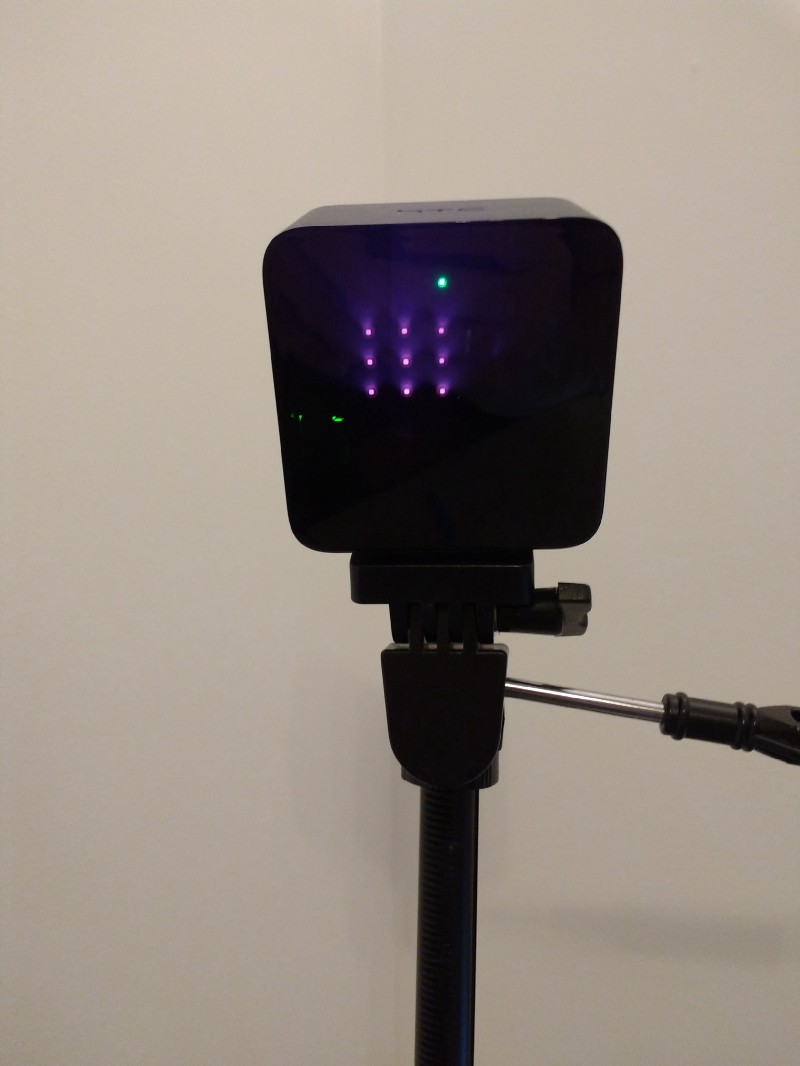 Base station on a tripod.
The tripod is not part of the bundle. There are some instructions to set everything up, you should follow them. It is worth pointing some notes though.
- The system has two parts. On one side you have the base stations that allow to track your movements. On the other, the goggles and the box.
- The goggles have a cable that connect it to the box. HTC is supposedly preparing a new device with no cable, no mobile and no PC for later this year.
- The box is connected to the computer and to the power. To the computer, use the cable USB-C to HDMI2 (“video”) and another cable (provided) for the USB.
- It may seem obvious. The box has similar sockets on both sides. Which one is in, which one is out? Tip. The cables in the googles have a little orange thingy and some of the sockets in the box have a little orange thingy.
- The base stations have a power cable, but they don’t need to be connected between them or to the computer.
- The base stations are recommended to be placed at opposite corners of the room (and fixed to the wall or ceiling). But I have them temporary situated on the same side of the room on both sides of my computer. I will fix them to the wall in the future. Another detail is that they need visual line of the floor.
Installing the operating system#
In the mentioned footnote 6 in the presentation of the iMac, you could read that VR requires “macOS High Sierra 10.13”.
High Sierra is currently in Beta. But it is public Beta, so you can join the program. After you’ve joined, you will receive access to the new version High Sierra.
A small issue is that you’re told to run macOSPublicBetaAccessUtility. Not sure if still relevant (I reported it in Beta 3 and we are in Beta 7), but if you try to install macOS High Sierra Beta without previously running the program, you will get a not very helpful message “Installation of macOS could not continue. Installation requires downloading important content”
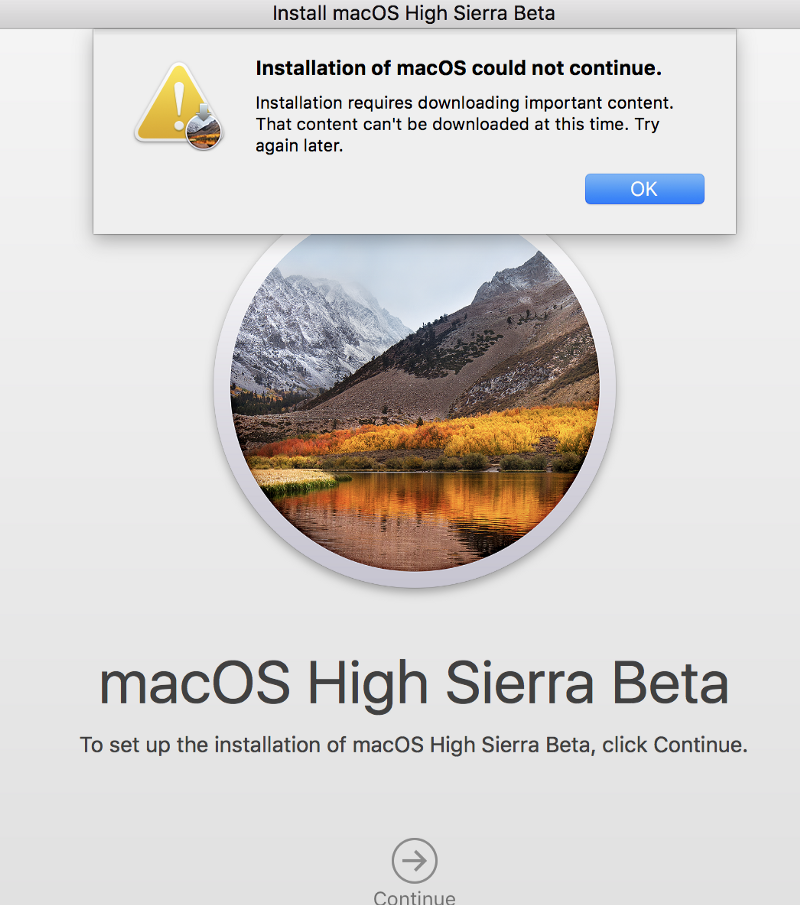 Not very helpful
Also the new operating system comes with a new Filesystem format. Apparently adapting programs to that format is not a trivial effort and initially there were many crashes (I couldn’t launch Garage Band until beta4 came in)
In general the OS works, but you have to be very tolerant. The other day a new version auto installed (beta 6) and the boot process afterwards wouldn’t complete (the usual macOS loading thingy was all night). I had to do a hard shut-down.
But things keep improving.
Installing the VR “driver”#
There is no such thing as a driver for HTC Vive. But almost everything VR related will require to have SteamVR installed. It’s sort of a control panel with multiple options.
The installation of SteamVR is very well explained in this post
Basically you first need need to install Steam including creating an account. And then install SteamVR beta.
The part on Firefox needs another post. Basically unusable.
Word of caution: SteamVR is a beta. It works, most of the time. But options such us “Update firmware” or “Camera” (to name just a couple) won’t work. Sometimes you change something that needs to restart the headset. It will crash, and you will need to quit the app in macOS and restart it again. Sometimes your desktop won’t shutdown because SteamVR is running (I think it was something in the early betas, because I no longer feel the same). Sometimes SteamVR is not running and you see your goggles start showing strange red squares or just get hot. Unplug your HMD if not using it for now. And be patient my friend.
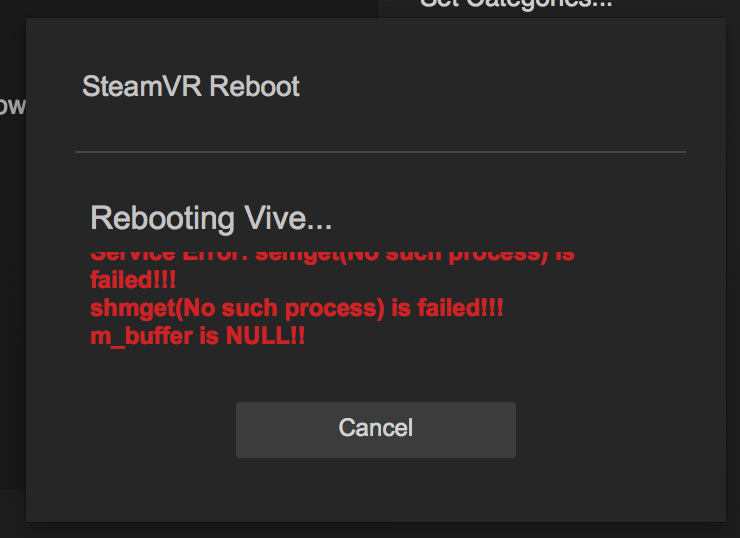 Rebooting VIVE
Calibrating the room#
Once your base stations are setup and SteamVR installed, you need to configure the layout of the room, available area and position of base station.
I cannot remember if it launched automatically the first time. If not, once you have SteamVR installed, you can select it from the menu.
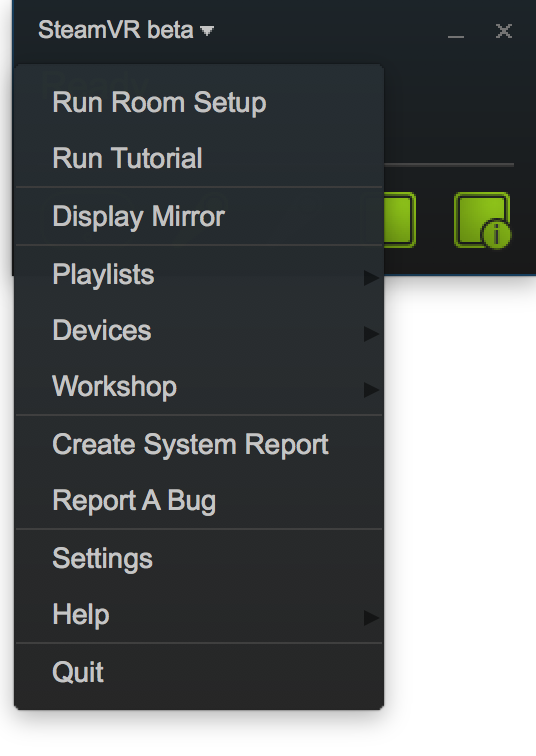 Menu in SteamVR for Room Setup
That launches a wizard, very easy to follow
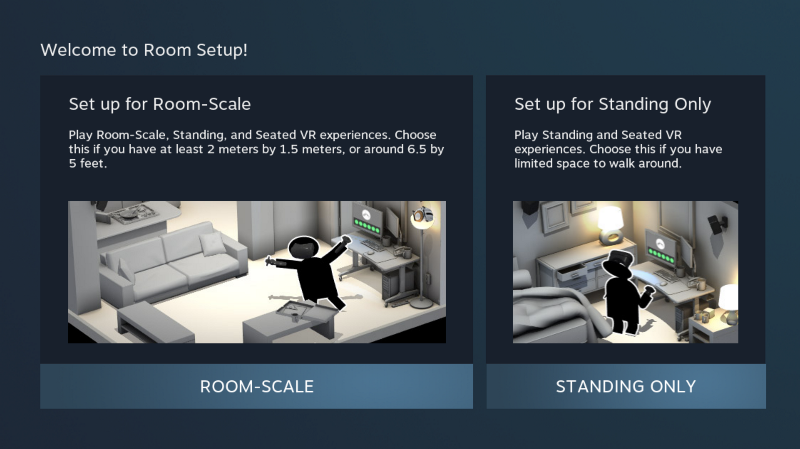 Room setup
Anticlimax#
So you’ve connected everything, and you’ve installed everything. You’ve calibrated the room. You launch Steam, you launch SteamVR. You put your goggles on and you get something that it was tricky to describe. It was like an empty white room, or seeing an igloo from inside. Yes, it was fully immersive. You really feel inside.
But empty.
At one point I read the word holodeck from Start Trek and that was the best way to describe.
I googled a lot, but I couldn’t get it described. In fact I stumbled the below picture while preparing this article but not searching for it. But I was about to just describe it (because there is no obvious way to take a picture of it)
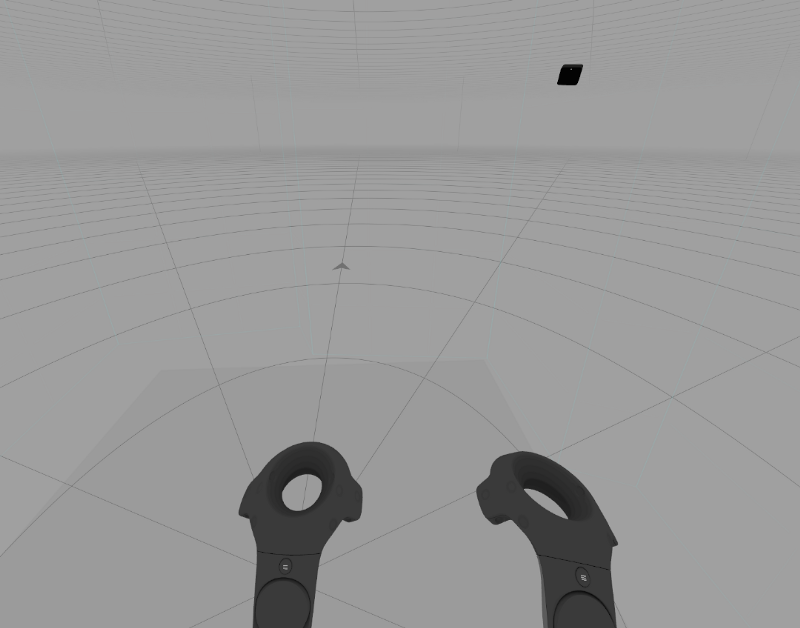 Picture taken from http://www.tomshardware.co.uk/steamvr-interface-customization-options,news-52539.htmlIn my device the image appears more whiteish than grey, but you get the idea
Also, in my experience, there are some additional blue lines. That is what’s called the chaperone, and basically gives you a reference of where you can move in your room (see calibrating room)
Anyway, I was expecting to see a way to launch games inside the environment. Or a way to launch Steam Workshop (sort of virtual rooms that are available to download and experience)
To the point that when I saw the white room I thought I had misconfigured something.
And I wrote Steam support. And they replied!!!

At one point I even contacted HTC support…And they said “What you describe is the extent of SteamVR on Mac at the moment. […] the SteamVR Dashboard and SteamVR Home have not yet been added to the Mac version of SteamVR […]”
By the way, two things to note.
- Yes, you can have your own “real life glasses” inside the goggles. You’re encouraged to.
- Yes, initially You may feel sick after looking too much into the goggles. Especially if you don’t set the interpupillary distance correctly.
Programming#
I will dedicate another post in this series to programming (not that I’m an expert, just my experience).
But I didn’t want any reader that has gotten so fast to leave this post without a proper experience of VR.
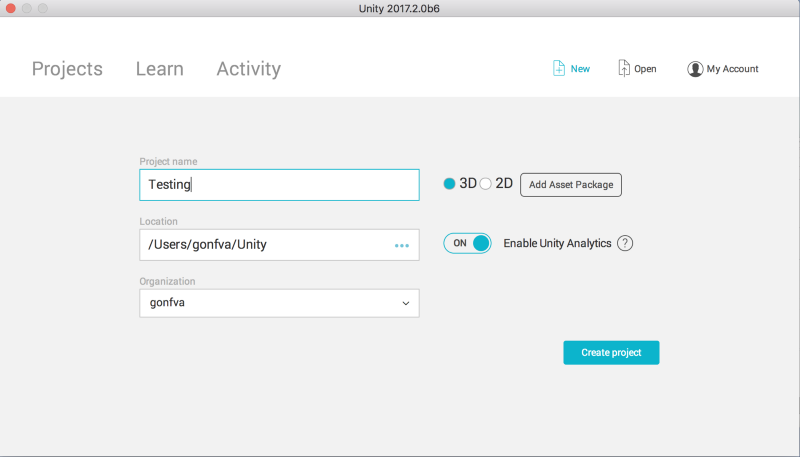
I think the easiest way to have something worth of a VR experience in macOS is to install a beta version of Unity.
Once you have Unity beta installed, create a new project. It doesn’t matter the name
And then go to this page, open with Unity and import the assets into your empty project, selecting everything by default.
Click on File-> Build Settings and you will get a new window
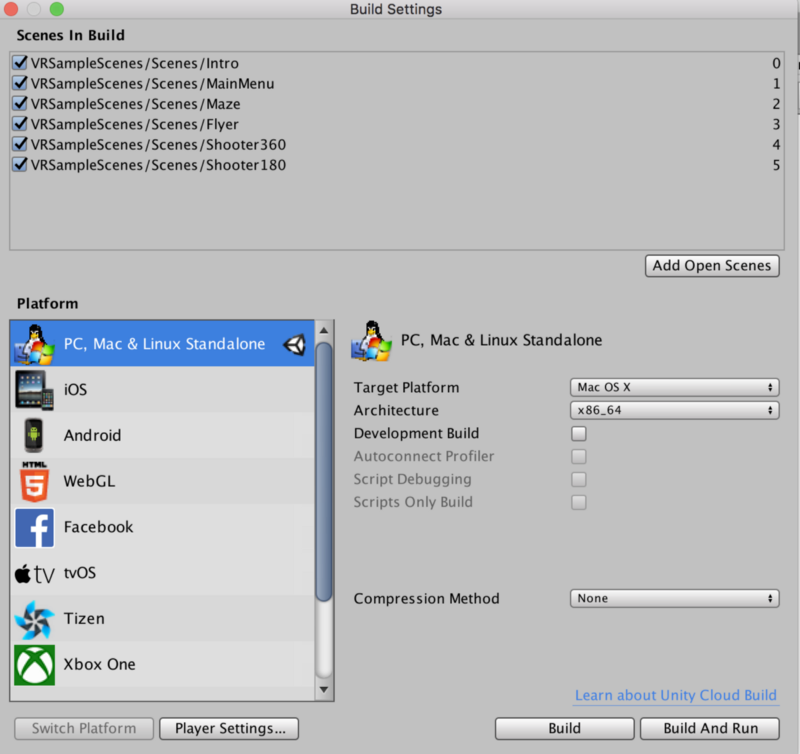 Build settings
Click on “Player Settings …” and in the right hand side you will get multiple options.
In the Other Settings select “Metal editor support experimental”
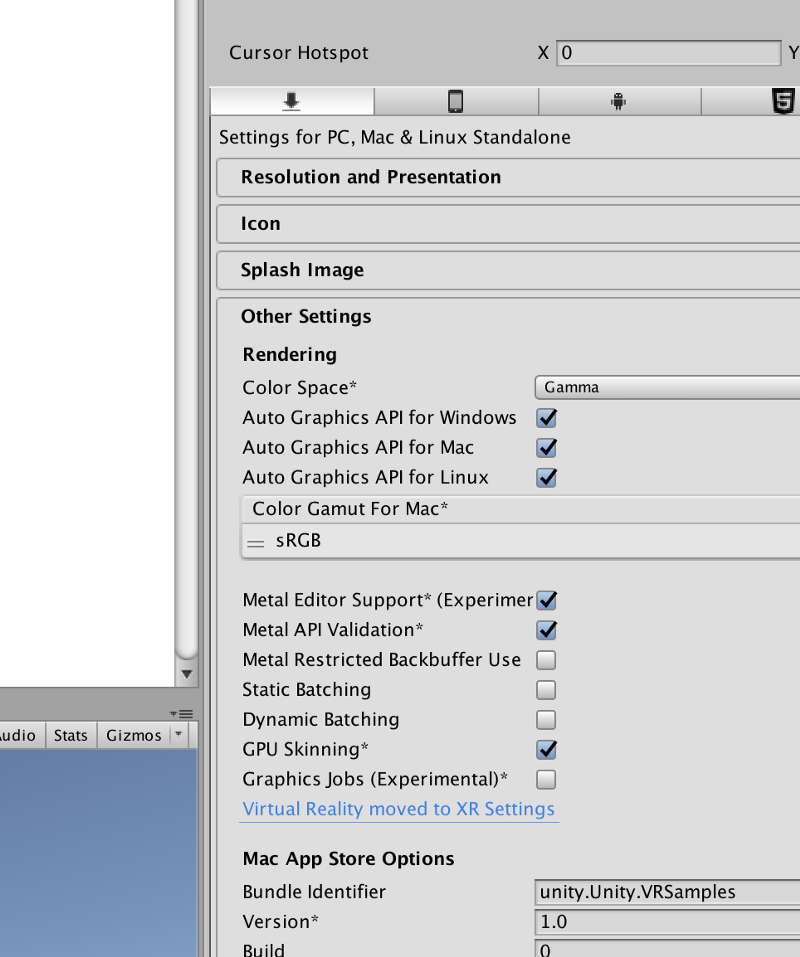 Metal editor support
And in XR, make sure VR is enabled and OpenVR SDK is loaded
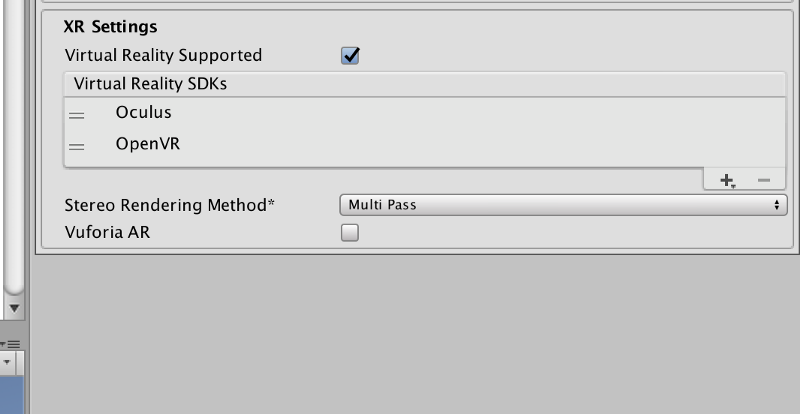 XR Settings
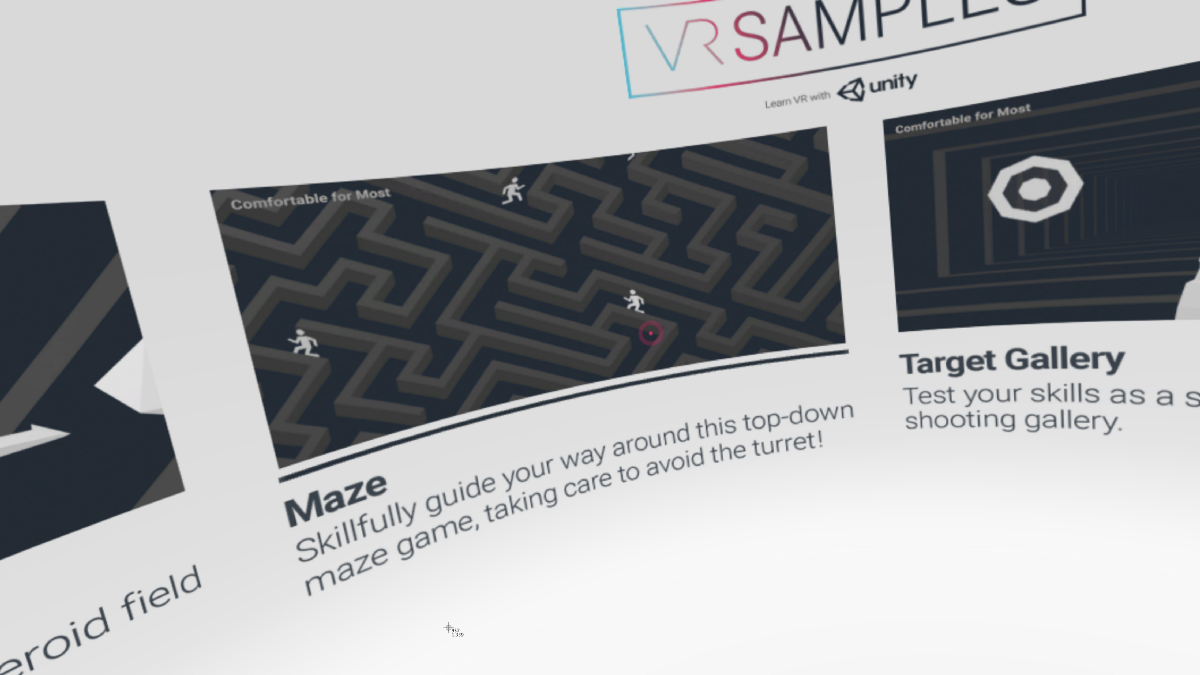
And click on Build and Run. Everything by default, and you will get to VR Samples.
Things to note: Fire button for these games is button 1 in this graphic. And button back is the ESC key in your keyboard.
If you want to stop the game, CMD+Q is your friend.
 Finally something worth of the VR label.
Conclusion#
I hope this post helps people in the same situation I was a month ago. Please, ping me if you land in this page and there is something confusing or unclear. I’ll do my best to help.
As I mentioned at the beginning. VR on Mac is still beta. This is not an early adopter experience. This early innovator.
But as I mentioned in the previous post, I perceive this is the moment to jump in.
Exciting!!!
First published here